The Irresistible Charm of Oreo Balloon Bowls: Your Guide to Edible Delights
Imagine a dessert that's not only delicious but also entirely edible, a playful creation that combines the iconic taste of Oreo cookies with the magic of melted chocolate. Welcome to the world of oreo balloon bowls! These ingenious edible cups are a show-stopping way to serve anything from ice cream and mousse to fresh fruit and mini trifles. Perfect for parties, a fun activity with kids, or simply a unique dessert experience, crafting your own oreo balloon bowls is easier than you think and promises a delightful reward.
The concept is simple yet brilliant: balloons act as temporary molds for a hardened chocolate and Oreo shell. Once the chocolate sets, the balloons are carefully removed, leaving behind a perfectly shaped, delicious vessel. This article will guide you through everything you need to know, from selecting the right ingredients to mastering the dipping technique and exploring creative fillings. Get ready to impress your guests and satisfy your sweet tooth with these charming confections.
Essential Ingredients and Tools for Perfect Oreo Balloon Bowls
Before you dive into the delicious fun of making oreo balloon bowls, gathering your supplies is key. Success lies in having the right ingredients and tools at your fingertips. Here’s what you’ll need:
- Oreo Cookies: The star! One standard package is usually enough for a dozen small bowls. Experiment with different flavors like Golden or Mint Oreos for unique twists.
- Melting Chocolate: High-quality melting chocolate or candy melts are best for ease of use as they set firmly. If using regular chocolate chips, add 1-2 teaspoons of coconut oil or shortening per cup of chocolate for a smoother consistency. Dark, milk, or white chocolate all work beautifully.
- Small Balloons: Opt for small, round balloons (like water balloons). Ensure they are clean and dry. Inflate them to your desired bowl size.
- Parchment Paper or Silicone Mats: To prevent sticking as bowls set.
- Baking Sheet or Tray: For holding your parchment and setting bowls.
- Microwave-Safe Bowl or Double Boiler: For melting chocolate.
- Spoon or Spatula: For stirring chocolate and coating balloons.
- Food Processor (Optional): For finely crushing Oreos. A zip-top bag and rolling pin also work well.
Having everything prepped and ready will make the process smooth and enjoyable, ensuring your focus remains on crafting beautiful, edible oreo balloon bowls.
Step-by-Step Guide to Crafting Your Own Oreo Balloon Bowls
Creating your own stunning oreo balloon bowls is an exciting culinary adventure. Follow these detailed steps for a flawless and fun experience:
Step 1: Prepare Your Balloons and Oreos
- Inflate and Clean Balloons: Inflate small balloons to your desired bowl size. Wash them gently with soap and water, rinse thoroughly, and let them air dry completely. This removes any manufacturing residue.
- Crush Oreos: Place Oreo cookies (cream and all) into a food processor and pulse until finely crushed into a sandy texture. Alternatively, place them in a sturdy zip-top bag and crush them with a rolling pin. Set aside.
- Prepare Workspace: Line a baking sheet with parchment paper or a silicone mat. This will be where your chocolate-dipped balloons will set.
Step 2: Melt the Chocolate
- Microwave Method: Place your melting chocolate or chips in a microwave-safe bowl. Microwave in 30-second intervals, stirring well after each, until the chocolate is smooth and fully melted. Be careful not to overheat it, as this can cause it to seize.
- Double Boiler Method: If using a double boiler, place chocolate in the top bowl over simmering water, stirring constantly until melted and smooth. Ensure no water gets into the chocolate.
- Adjust Consistency (Optional): If the melted chocolate seems too thick, stir in 1-2 teaspoons of coconut oil or vegetable shortening until it reaches a smooth, dip-able consistency.
Step 3: Dip and Coat Your Balloons
- Initial Dip: Hold a balloon by its knot. Dip the bottom half (or desired depth) of the balloon into the melted chocolate. Twist and rotate the balloon to ensure an even coating. Let any excess chocolate drip back into the bowl.
- Oreo Coating: Immediately after dipping, while the chocolate is still wet, generously sprinkle crushed Oreos over the chocolate-coated part of the balloon. You can also gently roll the wet chocolate in a bowl of crushed Oreos for full coverage. Press lightly to ensure the crumbs adhere well. For an extra sturdy bowl, a second dip in chocolate and re-coat with Oreos can be done after the first layer sets slightly.
- Set the Bowls: Place the chocolate-coated, Oreo-covered balloons upright on your prepared baking sheet. Ensure they are stable and not touching each other.
Step 4: Chill and Release
- Chill Time: Carefully transfer the baking sheet to the refrigerator and chill for at least 20-30 minutes, or until the chocolate is completely firm and hard to the touch.
- Release the Balloons: Once completely set, gently take the bowls out of the fridge. Carefully snip a small cut near the knot of each balloon. Let the air release slowly. As the balloon deflates, it should naturally pull away from the chocolate shell. If it sticks slightly, very gently peel it away from the edges.
- Inspect and Store: You now have beautiful, edible oreo balloon bowls! If there are any thin spots or minor imperfections, they can often be patched up with a little extra melted chocolate and crushed Oreos. Store your empty bowls at room temperature in a cool, dry place, or in the refrigerator if your kitchen is warm.
And there you have it – perfectly crafted oreo balloon bowls, ready to be filled with your favorite desserts! For more advanced techniques or troubleshooting tricky situations, you might find valuable insights in oreo balloon bowls - Article 2.
Creative Fillings and Variations for Your Oreo Balloon Bowls
Once you’ve mastered the art of making oreo balloon bowls, the real fun begins: filling them! The possibilities are virtually endless, making these edible vessels incredibly versatile for any occasion.
Filling Ideas:
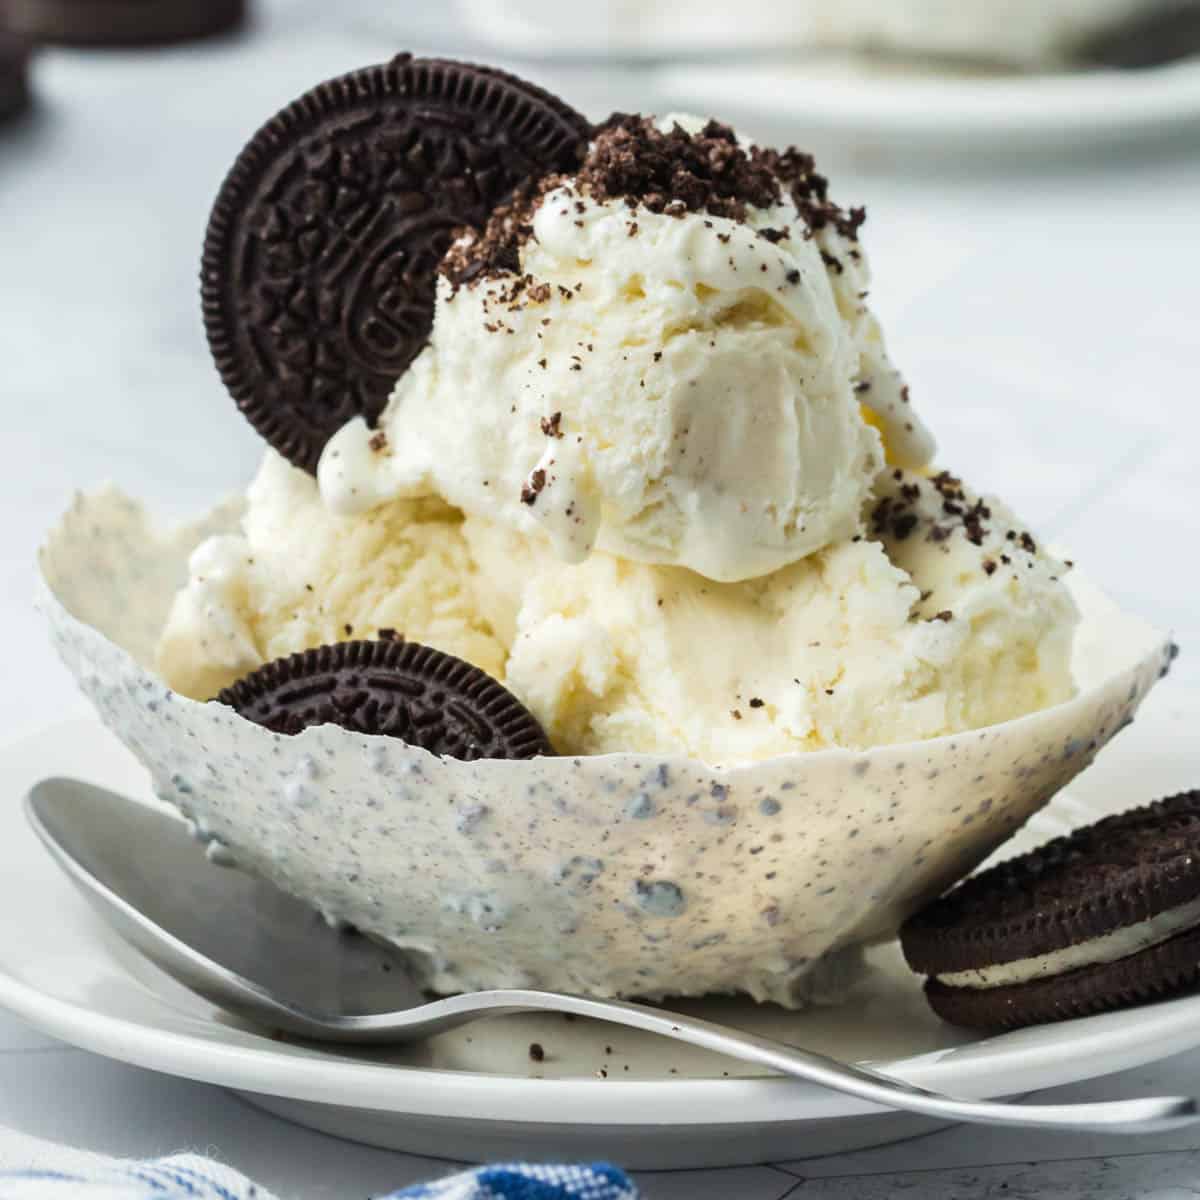
- Ice Cream Extravaganza: Scoop your favorite flavor of ice cream directly into the bowl. Top with whipped cream, sprinkles, or a drizzle of hot fudge for a miniature sundae.
- Rich Mousse: Chocolate, strawberry, or even a light lemon mousse would be delightful, contrasting beautifully with the slight crunch of the Oreo bowl.
- Pudding Perfection: Vanilla, chocolate, or butterscotch pudding makes for a simple yet comforting dessert. Add a layer of fresh fruit or mini marshmallows.
- Yogurt Parfaits: For a slightly lighter option, layer Greek yogurt with granola, berries, and a drizzle of honey.
- Fresh Fruit Medley: A vibrant mix of fresh berries, melon, kiwi, or grapes can create a refreshing and healthy-ish dessert.
- Mini Cheesecakes or Cupcakes: A small no-bake cheesecake filling or a mini cupcake inside can be a luxurious and surprising treat.
- Candy Wonderland: Fill with an assortment of small candies, M&Ms, or jelly beans for a fun, kid-friendly option.
Variations on the Bowls Themselves:
- Different Oreo Flavors: Experiment with mint Oreos for a refreshing twist, or Golden Oreos for a lighter flavor profile, perhaps paired with white chocolate.
- Chocolate Types: Use white chocolate and decorate with colorful sprinkles, or a blend of dark and milk chocolate for depth of flavor.
- Drizzles & Decorations: Once the bowls are set, you can drizzle them with contrasting melted chocolate, caramel, or even edible glitter for an extra touch of elegance.
- Layered Bowls: Create a multi-layered effect by dipping the balloon in one color of chocolate, letting it set, and then dipping it in another color (or with Oreos) for a two-toned look.
The beauty of oreo balloon bowls lies in their adaptability. Don't be afraid to mix and match flavors and textures to create your signature dessert. For even more innovative filling ideas and presentation tips, be sure to check out oreo balloon bowls - Article 3.
Troubleshooting Common Issues and Pro Tips for Success
While making oreo balloon bowls is generally straightforward, sometimes little challenges can arise. Don't worry, we've got you covered with solutions to common issues and some pro tips to ensure your edible masterpieces turn out perfectly every time.
Common Troubleshooting:
- Balloons Popping During Dipping:
- Issue: The chocolate is too hot.
- Solution: Ensure your melted chocolate has cooled slightly before dipping. It should be warm and fluid, not scorching hot. Using good quality, sturdy balloons also helps.
- Chocolate Not Sticking to the Balloon:
- Issue: Balloons might be greasy or have residue.
- Solution: Always wash and thoroughly dry your balloons before inflating and dipping. Even a tiny bit of grease can prevent chocolate from adhering properly.
- Bowls Breaking When Releasing Balloons:
- Issue: Chocolate wasn't fully set, or the balloon was removed too aggressively.
- Solution: Be patient! Ensure the chocolate is completely hard and firm from being chilled. When deflating, snip a small cut near the knot and let the air escape slowly. This allows the balloon to gently pull away.
- Thin Spots or Uneven Bowls:
- Issue: Inconsistent dipping or insufficient chocolate coating.
- Solution: For stronger bowls, you can do a second dip after the first layer has partially set. Ensure you rotate the balloon evenly during dipping, or use a spoon to build up chocolate in thinner areas.
- Oreo Crumbs Not Sticking:
- Issue: Chocolate started to set before crumbs were applied.
- Solution: Work quickly! Apply the crushed Oreos immediately after dipping the balloon in wet chocolate.
Pro Tips for Success:
- Temperature Control is Key: A cool kitchen helps chocolate set faster and prevents balloons from popping.
- Quality Matters: Invest in good quality melting chocolate and sturdy balloons. It makes a noticeable difference in the final product.
- Don't Over-Inflate: Inflate balloons just enough to create a nice bowl shape. Over-inflated balloons can be harder to handle.
- Prep Everything Ahead: Having your Oreos crushed, balloons ready, and workspace organized will make the dipping process stress-free and efficient.
- Embrace Imperfection: Your first batch might not be perfect, but they’ll still be delicious! Minor cracks can often be "glued" with a dab of melted chocolate.
- Storage Savvy: Store empty oreo balloon bowls in an airtight container at room temperature in a cool, dry place for up to a week. If filled, they should be refrigerated and consumed within a day or two depending on the filling.
Conclusion: The Sweet Satisfaction of Homemade Oreo Balloon Bowls
From the moment you dip your first balloon into molten chocolate and sprinkle it with crushed Oreos, you'll discover the simple joy and creative potential behind making oreo balloon bowls. These edible wonders are more than just a dessert; they're an experience, offering a unique blend of visual appeal, textural delight, and the comforting, familiar taste of everyone's favorite cookie. Whether you're hosting a birthday party, looking for a fun kitchen project with the kids, or simply want to elevate your dessert presentation, oreo balloon bowls deliver on all fronts.
We've walked through the essential ingredients, a step-by-step creation process, myriad creative filling ideas, and valuable troubleshooting tips to ensure your success. So, inflate those balloons, melt that chocolate, and get ready to create delicious memories. The satisfaction of crafting these delightful edible bowls, and then filling them with your favorite treats, is truly unparalleled. Go ahead, give them a try – your taste buds and your guests will thank you!
